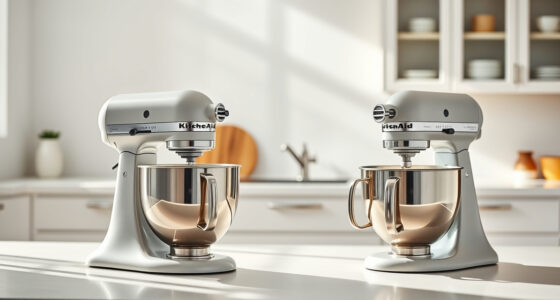

If your KitchenAid Artisan Series 5 Quart Tilt Head Stand Mixer is making a grinding noise, it can be alarming and disrupt your baking routine. This noise often indicates a mechanical issue that needs attention, but many problems are fixable with basic troubleshooting. Knowing how to identify and resolve the problem can save you time and money, and keep your mixer running smoothly for years to come. In this guide, we’ll walk you through practical steps to diagnose and fix common causes of grinding sounds in your mixer.

Get kitchen gear delivered free with Prime
- Fast, free delivery on millions of items
- Prime Video, Amazon Music and more included
- Member-only deals all year
Before starting any repair, ensure your mixer is unplugged and that you have the necessary tools on hand. We’ll cover safety tips, detailed steps to troubleshoot, and tips to prevent future issues.
Key Takeaways
| Identify the Noise | Grinding sounds often come from the gear or attachment area. |
| Check for Obstructions | Debris or dried ingredients can cause gear misalignment. |
| Lubricate Moving Parts | Proper lubrication can reduce grinding noise. |
| Inspect and Replace Worn Parts | Worn gears or attachments may need replacement. |
| Regular Maintenance | Cleaning and lubrication extend your mixer’s lifespan. |
Step 1: Unplug and Prepare Your Mixer
- Always unplug your KitchenAid mixer before beginning any inspection or repair to prevent electrical shock or accidental activation.
- Place the mixer on a stable, flat surface with enough space to access all sides.
- Remove the attachment (e.g., flat beater, dough hook, or wire whip) by unlocking the tilt-head and pulling it off.
Step 2: Inspect the Attachments and Gears
- Check the attachment hub and the attachment itself for debris, dried ingredients, or obstructions that could cause grinding.
- Look inside the attachment socket for any visible damage or misalignment.
- Remove the attachment and examine the gears in the attachment hub (if accessible) for signs of wear or damage.
Step 3: Lubricate the Gear Mechanism
If no visible damage is found, applying food-grade lubricant to the gear mechanism can help reduce grinding noises. Use a small amount and ensure it’s suitable for kitchen appliances.
Refer to your user manual for recommended lubrication points. Typically, the gear assembly in the head or attachment hub can benefit from a drop of lubricant to keep parts moving smoothly.
Step 4: Check the Gear and Drive Assembly
- Remove the mixer’s head (if applicable, following the manual’s instructions) to access internal gears and drive components.
- Inspect the plastic or metal gears for signs of wear, cracks, or broken teeth.
- If gears are worn or damaged, they will need replacement — consider contacting KitchenAid support or a professional repair service.
Step 5: Test and Reassemble
Once you’ve cleaned, lubricated, and inspected the parts, reassemble the mixer carefully. Lock the tilt-head into position and attach the accessory.
Plug in the mixer and turn it on at a low speed to see if the grinding noise persists. If it’s gone, you’ve successfully addressed the issue. If not, further inspection or professional repair may be necessary.
Tips and Warnings for Safe and Effective Troubleshooting
- Always unplug your mixer before any inspection or repair to avoid electrical hazards.
- Do not force parts or attachments, as this could cause additional damage.
- Use only food-grade lubricants suitable for kitchen appliances.
- If you’re uncomfortable repairing internal parts, seek professional service to avoid voiding your warranty.
The Products in This Guide

KitchenAid Artisan Series 5 Quart Tilt Head Stand Mixer
- ✔ Power: 325 watts
- ✔ Warranty: 1 year
- ✔ Color Options: Over 20

KitchenAid Stand Mixer Attachment
- ✔ Size: 14 x 8 x 6 inches
- ✔ Weight: 5 pounds
- ✔ Color: Silver
KitchenAid Artisan Series 5 Quart Tilt Head Stand Mixer
The KitchenAid Artisan Series 5 Quart Tilt Head Stand Mixer is built to last with robust metal construction and 59 touchpoints for excellent mixing performance. While grinding noises can sometimes occur, they are often fixable through cleaning, lubrication, or part replacement. Regular maintenance can significantly extend your mixer’s life.
Pros:
- Durable metal construction
- Easy to access tilt-head design
- Multiple speed settings
- Large capacity bowl
Cons:
- May develop gear noise over time
- Gears can wear with heavy use
- Requires maintenance for optimal performance
Best for: Baking enthusiasts who need a reliable, high-capacity mixer
Not ideal for: Users looking for a lightweight, portable mixer
Bottom line: A versatile and sturdy mixer, with simple fixes for grinding noises when properly maintained.
KitchenAid Stand Mixer Attachment
The KitchenAid Metal Food Grinder attachment connects easily to your stand mixer and offers multiple grinding plates, making it perfect for fresh meat, vegetables, and more. It’s a helpful add-on to keep your mixer functioning smoothly and avoid internal gear issues by maintaining parts properly.
Pros:
- Multiple grinding plates
- Easy to clean
- Sturdy metal build
- Large food tray
Cons:
- Additional cost
- Requires refrigerator chilling for best results
- Attachment sold separately
Best for: Home cooks wanting fresh ground ingredients
Not ideal for: Users not interested in grinding food frequently
Bottom line: A durable attachment that enhances your mixer’s functionality and helps prevent gear wear.
Frequently Asked Questions
Why is my KitchenAid mixer making a grinding noise?
Grinding noises often result from worn or damaged internal gears, debris in attachments, or lack of lubrication. Inspecting and cleaning these parts can usually resolve the issue.
Can I fix the grinding noise myself?
Yes, many issues can be fixed at home by cleaning, lubricating, and inspecting the gears. However, if internal gears are damaged, professional repair or replacement may be necessary.
How often should I lubricate my mixer?
It’s recommended to lubricate moving parts periodically, especially if you notice increased noise or resistance during operation, typically every 6-12 months depending on use.
When should I replace internal gears?
If you observe cracked or worn gear teeth, persistent grinding despite cleaning and lubrication, or abnormal vibrations, replacing the gears is advisable to restore proper functioning.
Is it safe to operate my mixer after fixing the noise?
Only operate the mixer once you are sure all parts are properly reassembled, lubricated, and free of debris. If in doubt, consult a professional technician for inspection.
Keep Your KitchenAid Running Smoothly
With proper inspection, cleaning, and maintenance, you can often fix the grinding noise in your KitchenAid Artisan Series mixer without professional help. Regular upkeep not only prevents future issues but also prolongs the life of your beloved kitchen appliance. Remember to follow safety precautions and seek professional repair when internal parts are damaged. A well-maintained mixer ensures your baking projects stay on track and your culinary creations taste their best.
Affiliate disclosure: As an Amazon Associate we earn from qualifying purchases. Prices and availability are accurate as of the time of publishing.
Halloween Picks
halloween
As an affiliate, we earn on qualifying purchases.