A reverse sear is a cooking method where you slow-cook your steak at a low temperature first, then finish with a quick, high-heat sear to create a flavorful crust. It guarantees even doneness and maximum juiciness. To get perfect results on any grill, start by preparing your steak, maintain consistent low heat for the first phase, then sear briefly at high heat. Keep going for expert tips that will elevate your grilling game.
Key Takeaways
- The reverse sear involves slow-cooking steak at low temperatures then searing at high heat for a flavorful crust.
- Choose the right grill type and size to ensure even heat and proper indirect/direct zones for optimal results.
- Proper preparation includes bringing the steak to room temperature, seasoning, and drying before cooking.
- After slow cooking, sear the steak for 1-2 minutes per side, then rest 5-10 minutes to maximize tenderness and juiciness.
- Practice and precise temperature control are key to achieving perfect, consistent reverse sear results on any grill.
Understanding the Reverse Sear Technique
The reverse sear technique is a method that involves cooking your meat slowly at a low temperature before finishing with a high-heat sear. This approach guarantees even cooking and a tender interior. To enhance flavor, you can explore various marinade techniques that infuse your meat with subtle or bold tastes, depending on your preference. When it comes to seasoning options, simple salt and pepper work well, but don’t hesitate to add herbs or spices to elevate the flavor profile. The key is applying seasonings before the low-temperature cook, allowing them to penetrate deeply. Once the meat reaches the desired internal temperature, a quick, hot sear creates a flavorful crust. This method offers control, consistency, and delicious results every time.
Choosing the Right Grill for Reverse Searing

When selecting a grill for reverse searing, you want one that’s compatible with your cooking style and needs. Consider the grill’s size and capacity to guarantee it fits your usual portions, and check if it offers precise heat control for even results. The right grill makes a big difference in achieving perfectly seared, tender steaks every time.
Grill Types Compatibility
Choosing the right grill is essential for achieving perfect reverse searing results, as not all grill types handle the process equally well. Charcoal grills excel at imparting smoky flavor variations that enhance your meat, while gas grills offer more precise temperature control for even cooking. Pellet grills provide versatility, allowing you to fine-tune heat and add subtle smoky notes. When selecting your grill, consider how it supports marinade techniques—some grills retain flavors better, boosting the depth of your seasoning. For instance, the open flame of a charcoal grill can intensify marinades with a charred aroma. Each grill type influences the final taste, so pick one that aligns with your flavor goals and ensures you can manage heat effectively for a perfect reverse sear.
Size and Capacity
Selecting the right grill size is vital for successful reverse searing because it directly impacts your ability to manage heat and cook evenly. A larger grill provides better cooking capacity, allowing you to create designated zones for indirect and direct heat, which is essential for reverse searing. If your grill is too small, you’ll struggle to fit larger cuts of meat and maintain consistent temperatures. Conversely, a grill with ample size offers flexibility and control, making it easier to sear and finish your meat perfectly. Consider your typical cooking needs—if you often cook for groups or want more versatility, opt for a grill with a bigger surface area. Choosing an appropriately sized grill ensures you have enough space and capacity to execute reverse searing successfully.
Heat Control Features
Having the right heat control features on your grill can make or break your reverse searing process. You want to be able to maintain a consistent grill temperature in the low and slow zone, usually around 225°F, without fluctuations. An adjustable vent or built-in temperature regulation allows you to fine-tune the heat easily. Additionally, look for a grill with a dedicated sear zone—this high-heat area helps you quickly develop a flavorful crust after the initial slow cook. Precise control over the grill temperature ensures even cooking and prevents overcooking during the reverse sear. Without these features, achieving the perfect balance of tender interior and crispy exterior becomes much more difficult. Investing in a grill with good heat control is key to mastering the reverse sear technique.
Preparing Your Steak for the Perfect Sear
Before you start the reverse sear process, it’s essential to prepare your steak properly. Begin by choosing the right cut and trimming excess fat if needed. Use marinating techniques to enhance flavor—whether with salt, herbs, or acids—allowing the meat to absorb seasonings overnight for better taste and tenderness. Next, verify your knife is sharp; a well-honed blade makes precise cuts and helps you handle the steak more confidently. Proper knife sharpening also prevents tearing the meat’s surface, which can affect searing quality. Let your steak come to room temperature before cooking to promote even heat distribution. Dry the surface thoroughly with paper towels—moisture hinders a good sear—and season generously just before grilling. These steps set the stage for a perfect, flavorful crust.
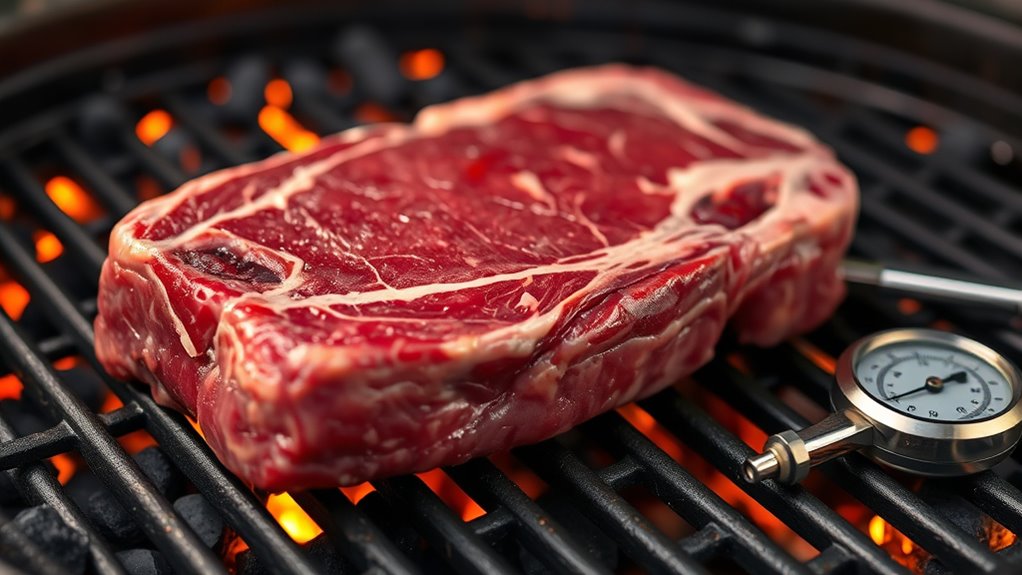
The Low-Temperature Cooking Phase

To achieve an even, perfectly cooked steak, you need to start with the low-temperature cooking phase. This gentle heat allows the meat to cook evenly from edge to center, preventing overcooking. During this stage, you can experiment with marinade options to infuse flavor and moisture, or apply seasoning techniques like salt and herbs to enhance taste. Keep the grill at a consistent, low temperature—around 225°F to 275°F—so the steak warms gradually. Use a meat thermometer to monitor internal temperature, aiming for about 10-15 degrees below your target doneness. This slow process ensures the steak develops a tender, uniform interior, setting the stage for a perfect sear later. Properly managing this phase guarantees a juicy, flavorful result.
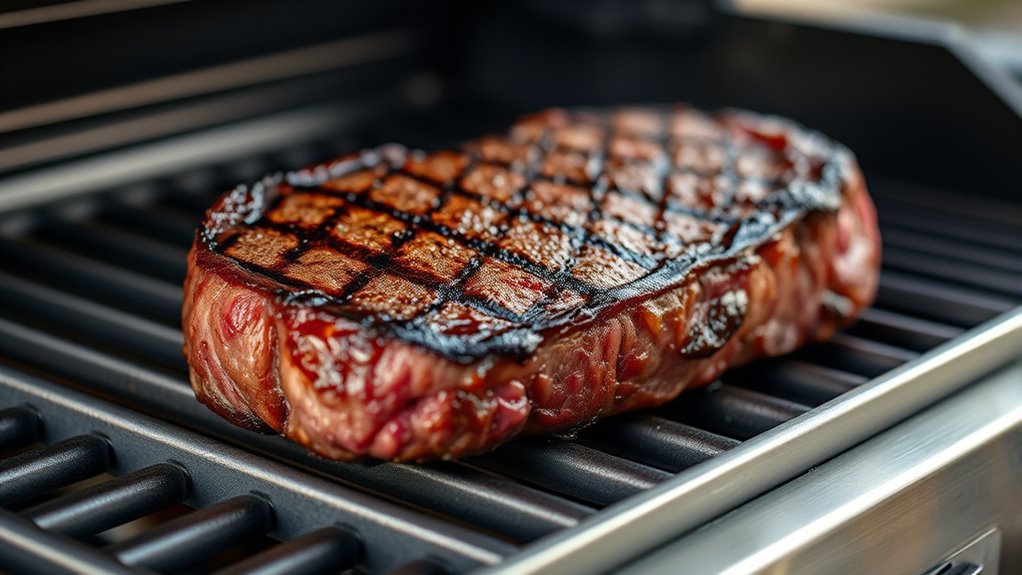
Achieving the Ideal Crust With a High-Heat Sear

Achieving the ideal crust requires applying high heat quickly after the low-and-slow cooking phase. Once your meat reaches the target internal temperature, crank up the grill’s heat and sear each side for 1-2 minutes. This creates a flavorful, caramelized exterior that contrasts beautifully with the tender inside. During this quick sear, focus on even contact to prevent burning and develop that perfect crust. Consider sauce pairing options that complement the rich, smoky flavors, like a tangy chimichurri or a spicy BBQ glaze. Presentation ideas include slicing the meat against the grain, arranging it neatly on a platter, and garnishing with fresh herbs. A well-executed high-heat sear elevates your dish, making it a visual and taste sensation.
Monitoring Doneness and Resting the Meat

Monitoring doneness and resting the meat are essential steps to guarantee your grilled meat turns out perfectly juicy and tender. Use a meat thermometer to check internal temperature, ensuring you reach your desired doneness without overcooking. Rest the meat for at least 5-10 minutes to allow juices to redistribute, keeping each bite flavorful. During this time, consider your marinating techniques to enhance tenderness and flavor, and plan the perfect side dish pairing to complement the meat’s richness. A well-rested steak is more enjoyable and easier to cut. Keep a close eye on the temperature, and resist the temptation to cut into it immediately. This patience guarantees a moist, tender bite every time.
| Doneness Level | Temperature Range | Juiciness | Texture |
|---|---|---|---|
| Rare | 120-125°F | Juicy | Tender, soft |
| Medium Rare | 130-135°F | Juicy | Slightly firm |
| Medium | 140-145°F | Moist | Firm |
| Well Done | 160°F and above | Less Juicy | Firm, dry |
Tips and Tricks for Consistent Results

Consistency in grilling comes down to preparation and technique. To achieve reliable results, focus on proper seasoning techniques—whether you prefer a dry rub or marinade options, guarantee even coverage and adequate rest time. Marinades can add flavor and tenderness, but don’t overdo them, as too much acid can break down the meat’s surface. Use a thermometer to monitor internal temperature and avoid guesswork. Maintain a steady heat, and consider preheating your grill to ensure even cooking. When applying seasoning or marinade, do so uniformly to prevent hot spots. Rest your meat properly after reversing sear to allow juices to redistribute. These tips help you develop muscle memory and create consistent, flavorful results every time you grill.
Frequently Asked Questions
Can I Reverse Sear Other Meats Besides Steak?
Yes, you can reverse sear other meats besides steak, like thicker cuts of pork or lamb. It’s also great for preparing seafood and cooking vegetables evenly. You start by gently cooking the meat or seafood at a lower temperature, then finish with a quick sear for flavor. This method guarantees juicy, tender results and perfectly cooked vegetables, making it versatile for various dishes and meats.
How Does Thickness Affect the Reverse Sear Process?
When it comes to the reverse sear, meat thickness plays a subtle dance with your cooking temperature. Thicker cuts require a gentler, slower warm-up to evenly reach your desired doneness, while thinner pieces heat faster and risk overcooking. So, you’ll want to adjust your cooking temperature accordingly, giving the meat enough time to develop that perfect interior without sacrificing the beautifully seared crust you’re after.
Is a Charcoal Grill Suitable for Reverse Searing?
Yes, a charcoal grill is great for reverse searing. Its high heat and natural flavor infusion from burning charcoal create excellent searing conditions. You can set up indirect heat zones for slow cooking, then move the meat over the coals for a perfect sear. This method enhances flavor and guarantees even cooking, giving you a juicy interior with a delicious, smoky crust every time.
How Do I Prevent Overcooking During the Low-Temperature Phase?
To prevent overcooking during the low-temperature phase, focus on temperature management by monitoring your grill’s heat closely. Use a reliable thermometer and set a target internal temperature for your meat. Incorporate seasoning strategies like applying a light coat of oil and salt beforehand, which helps retain moisture. Keep the heat steady, avoid opening the grill too often, and remove the meat promptly once it reaches your desired internal temperature.
What Are Common Mistakes to Avoid With Reverse Searing?
To avoid common mistakes with reverse searing, focus on proper temperature control and seasoning techniques. Don’t let the grill’s temperature fluctuate wildly, as it can cause uneven cooking. Make sure to season your meat evenly before cooking, and avoid overcooking during the low-temperature phase by monitoring closely. Also, don’t skip resting time after searing, as it helps juices settle, ensuring a tender, flavorful result.
Conclusion
Mastering the reverse sear is like painting a perfect portrait—you blend slow, tender strokes with bold, vibrant accents. By understanding the technique and choosing the right grill, you turn a simple steak into a masterpiece. With patience and attention, you’ll craft a crust that’s as inviting as a warm hug. Keep practicing, and soon, you’ll be turning heads and impressing everyone at the table with every beautifully seared bite.