Setting up your new Keurig K-Mini is simple and quick, whether it’s your first coffee maker or an upgrade. This guide walks you through the essential steps to ensure your device is ready for use, along with helpful tips and safety precautions to get the best brewing experience.

Get kitchen gear delivered free with Prime
- Fast, free delivery on millions of items
- Prime Video, Amazon Music and more included
- Member-only deals all year
Follow these clear instructions to enjoy fresh, hot coffee with minimal fuss, and learn how to maintain your machine for optimal performance.
Key Takeaways
| Compact Design | Fits small spaces with less than 5 inches width. |
| Custom Brew Size | Brew between 6-12oz for your preferred strength. |
| Easy Maintenance | Use descaling and cleaning kits regularly. |
| Travel Friendly | Removable drip tray accommodates travel mugs. |
| Energy Efficient | Auto off feature saves power. |
Unpack and Position Your Keurig K-Mini
- Remove the coffee maker from the box and check that all parts are included.
- Place the K-Mini on a flat, stable surface near an electrical outlet.
- Ensure there is enough clearance for water filling and mug placement.
Fill the Water Reservoir
Lift the water reservoir lid and remove it from the machine. Fill it with fresh, cold water up to your desired brew size (6-12oz). Place the reservoir back onto the machine securely.
Power On and Prepare for First Brew
- Plug in your Keurig K-Mini and press the power button to turn it on.
- Place a mug on the drip tray. If using a travel mug, ensure it fits under the spout.
- Insert a K-Cup pod or use a reusable filter if desired.
Run a Test Brew
- Select your preferred brew size (6-12oz).
- Press the brew button and wait for the coffee to dispense.
- Discard the first brew to flush out any manufacturing residues.
Maintenance and Troubleshooting Tips
- Regularly descale your machine every 3-6 months using compatible descaling kits.
- Clean the water reservoir and drip tray weekly.
- If the machine isn’t brewing, check water levels and ensure the reservoir is properly seated.
- Use the auto-off feature to save energy when not in use.
The Products in This Guide

Keurig K-Mini Single Serve K-Cup Pod Coffee Maker
- ✔ Capacity: 6-12oz
- ✔ Size: Less than 5 inches wide
- ✔ Mug Height: Up to 7 inches

My K-Cup® Reusable Coffee Filter
- ✔ Use: Ground coffee
- ✔ Cleaning: Easy to rinse
- ✔ Compatibility: Keurig K-Mini & more
Keurig K-Mini Single Serve K-Cup Pod Coffee Maker
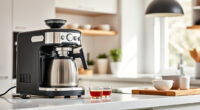
The Keurig K-Mini is a sleek and space-saving single-serve coffee maker perfect for small kitchens, dorms, or offices. It offers customizable brew sizes and easy maintenance, making it a reliable choice for quick coffee needs.
Pros:
- Compact and lightweight design
- Brews in minutes
- Removable drip tray for travel mugs
- Auto off energy saving feature
Cons:
- Limited water reservoir capacity
- No on/off switch, relies on auto off
- No temperature control
Best for: Small spaces, single users, quick coffee on-the-go
Not ideal for: Large households or those needing multiple cups at once
Bottom line: A compact, efficient coffee maker ideal for small spaces and quick brews.
My K-Cup® Reusable Coffee Filter
The My K-Cup® Reusable Coffee Filter allows you to brew your favorite ground coffee with your Keurig, offering more control over flavor and cost savings. It’s compatible with the K-Mini and other Keurig models.
Pros:
- Brew with your own ground coffee
- Cost-effective and eco-friendly
- Easy to clean
- Compatible with multiple models
Cons:
- Requires regular cleaning
- May not fit all mug sizes
- Needs ground coffee prep
Best for: Enjoying custom blends and saving on pods
Not ideal for: Those preferring pre-packaged K-Cups or quick setup
Bottom line: A versatile reusable filter for ground coffee lovers, compatible with your Keurig.
Frequently Asked Questions
How do I perform a descaling on my Keurig K-Mini?
Use a descaling solution mixed with water, run a brew cycle, then rinse with fresh water. Repeat every 3-6 months to remove mineral buildup.
Can I brew larger than 12oz on the K-Mini?
No, the K-Mini is designed for 6 to 12oz brew sizes. For larger cups, use a travel mug or consider a different model.
Is it safe to leave water in the reservoir overnight?
It’s safe, but it’s recommended to empty and refill with fresh water before each use to ensure optimal freshness and prevent mold.
Can I use ground coffee instead of K-Cups?
Yes, with the My K-Cup reusable filter, you can brew ground coffee directly in your Keurig.
Enjoy Your Perfect Brew — Easy Setup & Maintenance
With these straightforward steps, your Keurig K-Mini is ready to deliver fresh coffee whenever you need it. Regular cleaning and descaling will keep your machine in top shape, ensuring every cup tastes just right. Enjoy your coffee moments with confidence and convenience!
Affiliate disclosure: As an Amazon Associate we earn from qualifying purchases. Prices and availability are accurate as of the time of publishing.
Evergreen bestsellers Picks
bestsellers
As an affiliate, we earn on qualifying purchases.