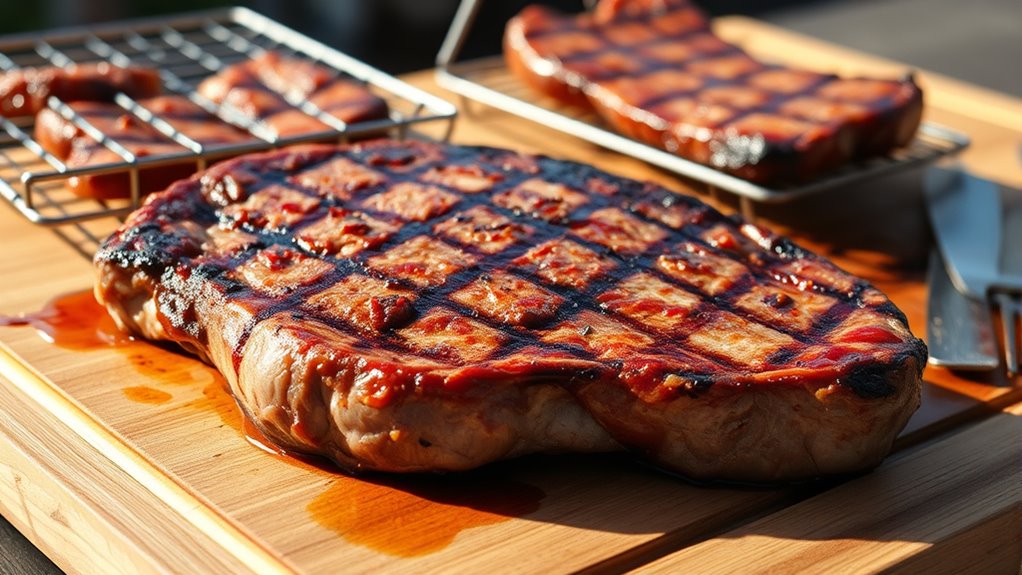

After grilling, you should transfer the meat to a plate or cutting board and cover it loosely with aluminum foil. Let it rest for about 5-10 minutes for steaks, or 15-20 minutes for roasts, to allow juices to redistribute. Resting prevents juices from escaping when you cut, keeping your meat moist and tender. Paying attention to temperature and technique can make a big difference—if you continue, you’ll discover the full benefits of proper resting.
Key Takeaways
- Remove meat from heat, place on a cutting board or plate, and loosely cover with foil to begin resting.
- Rest meat for 5-10 minutes for steaks or 15-20 minutes for roasts to allow juices to redistribute.
- Resting prevents juices from escaping, keeping the meat juicy and flavorful.
- Use a meat thermometer to monitor internal temperature and avoid overcooking during resting.
- Slice against the grain with a sharp knife after resting to maximize tenderness and moisture retention.
Resting meat is an essential step that guarantees your steak or roast stays juicy and flavorful. When you finish grilling, it’s tempting to cut right into it, but skipping this step can cause all those tasty juices to escape, leaving you with dry meat. Proper resting allows the juices to redistribute throughout the cut, ensuring every bite remains moist and tender. To maximize the benefits, you should pay attention to the resting temperature, which varies depending on the type of meat. For steaks, a resting temperature around 130°F to 135°F allows the juices to settle without overcooking. Larger roasts may need a slightly higher temperature, around 140°F to 145°F, to ensure thorough resting without losing too much heat. Using a meat thermometer helps you monitor this temperature accurately, so you can time your rest perfectly.
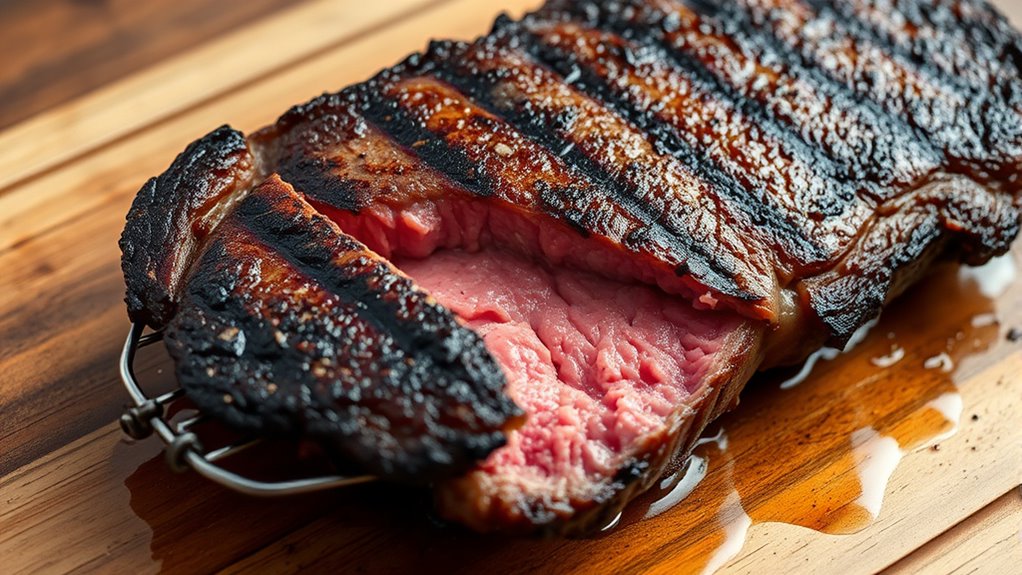
Once you’ve removed your meat from the grill, place it on a cutting board or plate, tented loosely with aluminum foil to retain some warmth. The goal isn’t to keep the meat hot but to allow the internal juices to redistribute. During this time, you’ll want to take into account your slicing techniques to preserve the meat’s moisture. When slicing, cut against the grain—this shortens the muscle fibers, making each bite more tender. Using a sharp knife is essential; a dull blade will crush the fibers instead of slicing cleanly, causing juices to be squeezed out and resulting in a drier piece of meat. Pay attention to the direction of the grain and make steady, even slices. For larger roasts, slice thinly against the grain to maximize tenderness, while for steaks, a slightly thicker cut can enhance juiciness. Additionally, choosing the right cutting technique can significantly impact the final texture.
Timing is fundamental when it comes to resting. Typically, you should rest a steak for about 5 to 10 minutes, and a roast for 15 to 20 minutes, depending on its size. During this period, the internal temperature may rise a few degrees due to residual heat, a phenomenon known as carryover cooking. This is why monitoring the initial temperature before resting is important—so you don’t overcook your meat. When you finally cut into your rested meat, you’ll notice a significant difference: the juices stay locked inside, and the meat’s texture is much more enjoyable. Proper slicing techniques combined with the right resting temperature make all the difference in serving a juicy, flavorful piece of meat every time.

Alpha Grillers Meat Thermometer Digital – Instant Read Food Thermometer for Cooking & Grilling – Professional Kitchen Fathers Day Gift for Dad Men Him Husband
Instant Read Food Thermometer | Our instant read thermometer features a temperature probe and advanced, highly accurate technology…
As an affiliate, we earn on qualifying purchases.
As an affiliate, we earn on qualifying purchases.
Frequently Asked Questions
How Long Should I Rest Different Types of Meat?
You should rest different meats based on their cooking temperatures and resting durations. For steaks cooked to medium-rare, rest for 5-10 minutes; for larger roasts, aim for 15-20 minutes. Chicken and pork benefit from 5-10 minutes, while thicker cuts may need up to 20 minutes. Resting allows juices to redistribute, ensuring a flavorful, moist result. Always consider the meat’s size and temperature to determine the perfect resting time.
Can I Cover the Meat While Resting?
Sure, go ahead and cover your meat while resting—if you want to turn it into a cozy sauna. Covering meat traps heat and moisture, helping the juices redistribute, but it can also make the crust soggy. Resting techniques usually suggest a loose tent of foil, which keeps things warm without smothering. Just don’t seal it too tight; your meat deserves to breathe, not stew.
Does Resting Meat Affect Its Juiciness?
Resting meat helps preserve its juiciness, which directly impacts meat tenderness and flavor retention. When you let the meat sit, the juices redistribute evenly, preventing them from spilling out when sliced. This process keeps the meat moist, tender, and flavorful. So, yes, resting meat considerably improves its juiciness, ensuring every bite is juicy, tender, and full of flavor, making your grilled meat more enjoyable.
Should I Rest Meat at Room Temperature or Refrigerate?
Rest meat at room temperature for about 10 minutes, but never longer than two hours, to guarantee temperature safety. Resting at room temp helps juices redistribute, making your meat insanely tender and flavorful. Refrigerating defeats the purpose—cold meat won’t reabsorb juices. Keep it in a warm spot, cover loosely, and enjoy the perfect balance of safety and flavor. Trust me, your taste buds will thank you!
What Are the Signs That Meat Is Ready to Be Sliced?
You’ll know meat is ready to be sliced when it has reached the suitable cooking temperature and its juices are slightly clear, not red or pink. Resting meat allows the juices to redistribute, increasing tenderness. When you see a slight jiggle or the meat feels firm but still tender to touch, it’s a sign it’s perfect for slicing. Let it rest for about 5-10 minutes for ideal tenderness and flavor.

Meat Cutting Board – Extra Large Bamboo Carving Board, 18 x 13 Thick Butcher Block Cutting Board with Deep Juice Groove, Non Slip Center, Reversible Board for Steak, Brisket, Turkey, Grilling BBQ Prep
BBQ MEAT CUTTING BOARD: Extra large 18 x 13 bamboo meat cutting board gives you a thick, sturdy…
As an affiliate, we earn on qualifying purchases.
As an affiliate, we earn on qualifying purchases.
Conclusion
Remember, resting your meat is the secret to a juicy, flavorful bite. It allows the juices to redistribute, ensuring each forkful is tender and delicious. Don’t rush this step—patience truly pays off. Think of it as letting things settle after a storm; the results are worth the wait. So next time you grill, give your meat the time it needs to rest. Trust me, it’ll make all the difference in your next meal.

Stock Your Home Aluminum Foil Sheets, 200 Count, 15' Extra Wide Heavy Duty, Pop Up Foil Sheets for Restaurant, Deli, Home Use
Heavy Duty: Crafted from 100% aluminum, our foil sheets for food are ultra durable at 13 gauges thick,…
As an affiliate, we earn on qualifying purchases.
As an affiliate, we earn on qualifying purchases.

Cutluxe Brisket Knife – 12" Carving & Slicing Knife for Meat & BBQ – Razor Sharp German Steel, Sheath Included, Ergonomic Full Tang Handle Design, Fathers Day Gift For Dad – Artisan Series
PREMIUM PERFORMANCE – Perfectly engineered slicing carving knife tapered to a razor-sharp edge for effortless carving and slicing…
As an affiliate, we earn on qualifying purchases.
As an affiliate, we earn on qualifying purchases.