To set up a two-zone grill, start by arranging your fuel source on one side for direct heat—pile charcoal to create a hot, searing zone or turn on one side of your gas grill. Leave the other side empty for indirect cooking, keeping it cooler. Adjust air vents or burner controls to maintain consistent temperatures. Properly testing your zones guarantees perfect control. Keep going for more tips on mastering this versatile setup.
Key Takeaways
- Arrange charcoal or gas burners on one side of the grill for the direct heat zone, leaving the other side cool for indirect cooking.
- Spread or mound coals on one side for consistent high heat; for gas, turn on only one side’s burners.
- Keep the lid closed during indirect cooking to maintain temperature and prevent heat loss.
- Adjust vents or burner controls to regulate airflow and stabilize the temperature in both zones.
- Use a grill thermometer to monitor temperatures and ensure proper heat distribution between zones.
Understanding the Concept of Two-Zone Cooking

While it may seem simple, understanding the concept of two-zone cooking is key to mastering your grill. This method relies on grill zone separation, creating distinct areas for direct and indirect heat. You’ll position coals or burners on one side, leaving the other side cool for indirect cooking. Proper heat distribution techniques make certain you can control temperature zones effectively. By managing these zones, you can sear meats over high heat and then move them to the cooler side to finish cooking gently. This setup prevents burning and promotes even cooking, giving you better control over the process. Recognizing how to establish and maintain these zones is fundamental to achieving consistent, delicious results every time you fire up your grill.
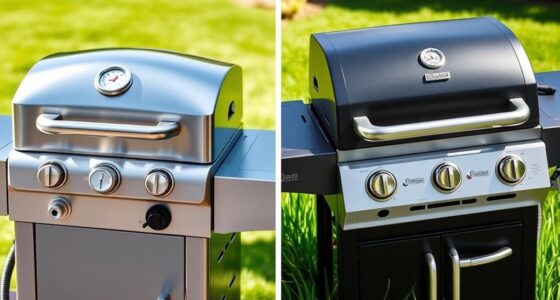
Choosing the Right Grill Setup for Your Needs

Choosing the right grill setup depends on your cooking style, space, and the types of dishes you want to prepare. If you often cook different foods simultaneously, a two-zone setup with distinct direct and indirect heat zones works best. Consider your available grill accessories, like grilling baskets or rotisserie attachments, to enhance versatility. Using the right cooking utensils, such as long-handled tongs and spatulas, makes managing different heat zones easier. Think about your typical meals—if you prefer searing steaks and slow-cooking ribs, a setup that allows easy shift between direct and indirect heat is ideal. Tailoring your grill setup to your needs ensures efficient cooking, better results, and a more enjoyable grilling experience.
Preparing Your Grill Before Lighting

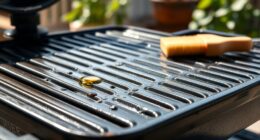
Before lighting your grill, it is vital to give it a thorough clean and inspection. Proper grill cleaning ensures food doesn’t stick and helps prevent flare-ups. Check for any grease buildup or debris from previous cooks. Additionally, select the right fuel for your setup—whether charcoal or gas—since fuel selection impacts heat control and flavor.
Before igniting, consider these steps:
- Remove leftover ashes or debris from the grill surface
- Ensure vents and air intakes are unobstructed
- Confirm that your fuel source is full and properly connected
Taking these precautions guarantees a safe, efficient start and a consistent cooking environment for your two-zone fire. Proper preparation makes all the difference in achieving perfect results.
Arranging Charcoal or Gas for Direct Heat Zone

After cleaning and inspecting your grill, it’s time to arrange the charcoal or gas to create a dedicated direct heat zone. For charcoal grills, place the charcoal in a mound or spread it evenly on one side of the fire grate, depending on your preferred heat intensity. Proper charcoal placement guarantees consistent, high heat for searing or quick cooking. If you’re using a gas grill, turn on the burners only on one side, leaving the other side off to serve as your indirect zone. Adjust the fire grate positioning so the heat source is confined to one area, creating a clear boundary between direct and indirect zones. This setup allows you to cook foods directly over the flame for searing or browning.
Creating the Indirect Heat Zone

To create the indirect heat zone, start by arranging your charcoal or coals on one side of the grill or turn on only some of your gas burners. This setup keeps heat away from the food, allowing it to cook slowly without direct contact with flames. Adjust the arrangement until you have a clear separation between direct and indirect heat areas.
Arranging Charcoal or Coals
Creating an indirect heat zone begins with arranging your charcoal or coals thoughtfully. Proper charcoal placement guarantees you establish an effective heat zone separation, allowing you to cook indirectly. To do this, pile the coals on one side of the grill, creating a designated hot spot, while leaving the other side free of coals for indirect cooking. Consider these tips:
- Spread the coals evenly in a mound on one side for consistent heat.
- Use a two-zone setup by stacking coals on one side only.
- Leave the opposite side free of coals for gentle, indirect heat.
This arrangement helps control temperature and prevents flare-ups, making it easier to cook foods slowly or indirectly without direct flame contact. Guarantee your charcoal placement supports your desired heat zone separation for top-notch grilling results.
Configuring Gas Burners
When setting up your gas grill for indirect heat, start by turning on only some of the burners while leaving others off. This gas burner configuration creates a dedicated indirect heat zone, allowing you to control the placement of your food. Adjust the flame control on the lit burners to a medium or low setting, ensuring steady, manageable heat. Keep the unlit burners off to prevent direct contact with the heat source. This setup helps you cook larger or delicate items evenly without flare-ups. Use the burner controls to fine-tune the indirect zone’s temperature. Keep the lid closed to maintain consistent heat and monitor the temperature with a grill thermometer. Proper flame control and burner arrangement are key to successful indirect grilling.
Lighting and Igniting Your Grill Safely

Lighting your grill safely is vital to prevent accidents and guarantee a successful cookout. Proper lighting safety and effective ignition techniques help keep you safe and ensure your grill works efficiently. Always check for gas leaks before igniting, and keep a fire extinguisher nearby. Use long-handled lighters or matches to stay at a safe distance from flames. Remember these tips:
- Open the lid before igniting to prevent gas buildup.
- Light the burners in sequence, starting from the closest to the ignition source.
- Keep the burners on low initially, then adjust to desired heat.
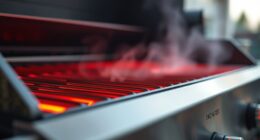
Adjusting Air Vents and Temperature Controls

Adjusting air vents and temperature controls is essential for achieving ideal grilling conditions. You want to regulate airflow through the air vent to control the intensity of the fire and maintain consistent heat. Opening the air vent increases oxygen, making the fire hotter, perfect for searing or high-heat cooking. Closing it slightly reduces oxygen, lowering the temperature for indirect grilling. Use the temperature control to fine-tune the heat by adjusting the lid’s vents or dampers, if available. Keep a close eye on your grill’s thermometer to ensure the temperature stays within your target range. Properly adjusting these controls helps you maintain steady heat, prevents flare-ups, and ensures your food cooks evenly on both the direct and indirect heat zones.
Testing Heat Zones for Proper Temperature

To guarantee your two-zone grill is set up correctly, you need to test each heat zone to confirm they’re at the desired temperatures. Use a reliable grill thermometer to check the temperature in both zones. This step ensures your setup works with your preferred fuel types, whether charcoal or gas, and helps you select the right grill accessories for accurate readings.
- Place the thermometer in the center of each zone and wait 5-10 minutes.
- Adjust vents or burners if the temperatures are off.
- Use a heat-resistant surface or grill mats to prevent damage and get precise readings.
Testing your heat zones allows you to fine-tune your setup, ensuring proper cooking temperatures for different foods and providing confidence during your grilling session.
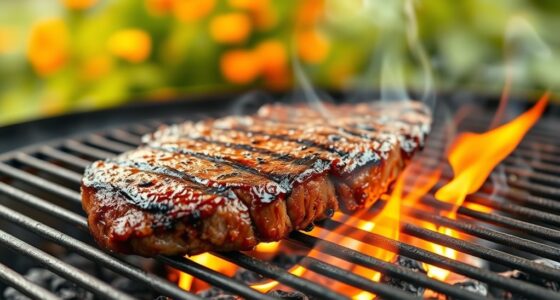
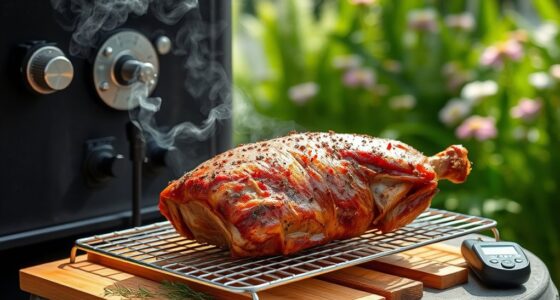
Using the Two-Zone Setup for Different Foods

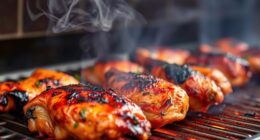
Once you’ve confirmed your heat zones are at the right temperatures, you can start using them to cook different types of foods simultaneously. The direct heat zone is perfect for searing steaks or burgers, giving them a nice crust. Meanwhile, the indirect zone is ideal for slow-cooking or smoking techniques, allowing flavors to infuse deeply without burning. You can also utilize the two-zone setup for flavor infusions by adding wood chips to the indirect side, creating a smoky environment. This setup helps you manage multiple dishes efficiently, like grilling vegetables on direct heat while smoking ribs on indirect. Adjusting the zones based on cook times and desired flavor profiles guarantees your foods turn out perfectly, whether you want quick sears or slow, flavorful smoking.
Tips for Maintaining Consistent Heat During Cooking

Maintaining consistent heat during cooking is key to achieving perfect results on your two-zone grill. To prevent temperature fluctuations and ensure even heat distribution, focus on these tips. First, adjust your vents or lid to control airflow, which helps stabilize temperature. Second, monitor your grill’s thermometer regularly and make small adjustments as needed. Third, avoid opening the lid too often, as this causes heat loss and uneven cooking. By keeping a close eye on heat levels and making timely adjustments, you’ll prevent hot spots and cold zones. Remember, steady heat results in better control, juicier meats, and more consistent cooking. These simple practices help you master your grill’s heat, making every cookout successful.
Frequently Asked Questions
How Long Does It Typically Take to Establish Proper Heat Zones?
It usually takes about 15 to 20 minutes to establish proper heat zones on your grill. To do this, preheat the grill with lid closed, then adjust the vents or burners to reach your desired grill temperature. For a heat zone setup, keep one side hot for direct heat and the other cooler for indirect cooking. Monitoring the temperature with a grill thermometer helps make certain your heat zones are correctly established for perfect grilling.
Can I Convert a Single-Zone Grill Into a Two-Zone Setup?
Yes, you can convert a single-zone grill into a two-zone setup. Start by using grill modifications like installing a divider or placing a heat-resistant barrier to achieve zone separation techniques. Move the coals or adjust the burners to create hot and cool areas, giving you better control over direct and indirect heat. This allows you to cook different foods simultaneously, improving your grilling versatility.
What Safety Precautions Should I Follow During Setup?
Think of setting up your grill as orchestrating a safe symphony; each note must be precise. Always wear heat-resistant gloves, keep a spray bottle of water nearby for flare-ups, and guarantee your grill is on a flat, stable surface. Avoid overloading with fuel, and never leave the grill unattended. These steps help prevent fire hazards and ensure your grill safety, turning your barbecue into a delicious, worry-free performance.
How Do I Troubleshoot Uneven Heat Distribution?
If you notice uneven heat distribution on your grill, start by checking the grill temperature across different zones. Adjust the heat control valves or burners to even out hotspots. Make sure the vents are open to allow proper airflow, which helps maintain consistent temperatures. Also, clean your grates regularly—grime can block heat flow. These steps help you achieve even cooking and better control over your grill’s heat.
Are There Specific Types of Food Best Suited for This Method?
You’ll find that foods like vegetables, seafood, and thin cuts of meat work best with this method, as they cook quickly and evenly over direct heat or gently through indirect heat. Using a grill basket helps prevent small or delicate items from falling apart. To enhance flavor, apply marinade techniques beforehand, allowing the marinade to penetrate deeply, ensuring your food stays juicy and flavorful whether you’re grilling directly or indirectly.
Conclusion
Mastering your two-zone grill is like conducting a symphony—you control the rhythm of direct and indirect heat to create perfect dishes. With practice, you’ll steer your fire with confidence, turning raw ingredients into culinary harmony. Keep adjusting and testing, and soon your grill will sing in tune with your cooking desires. Remember, a well-balanced fire is the heartbeat of great grilling—so keep that flame steady and enjoy every flavorful note.