To build a DIY brick pizza oven in your yard, start with careful planning to design the shape and size, then gather quality firebricks, mortar, insulation, and tools. Choose a stable, level location and build a solid foundation with concrete or gravel. Construct the dome by layering bricks with heat-resistant mortar, and cut an opening for the door and ventilation. Finish with cladding and proper curing. If you keep exploring, you’ll discover step-by-step tips for mastering each stage.
Key Takeaways
- Plan and design your oven carefully, including size, dome shape, and ventilation for optimal heat retention.
- Prepare a solid foundation with leveled ground and firebricks or concrete slab for stability.
- Use high-quality firebricks and refractory mortar to build the dome and core structure securely.
- Install proper insulation layers and build the oven opening and door frame for efficient heat retention and airflow.
- Finish with decorative elements, cure with gradual heating, and perform regular maintenance for safety and durability.

Fire bricks, Food Grade Woodstove Firebricks, 3000F, Size 9″ x 4-1/2″ x 1-1/4″, 4-Pack, Insulating Fire Bricks, Clay Firebricks Replacement for Wood Stoves, Fireplaces, Fire Pit, Kiln, Pizza Oven
Food Safe: Made of clay, it can be in direct contact with food and can be used in…
As an affiliate, we earn on qualifying purchases.
As an affiliate, we earn on qualifying purchases.
Planning and Designing Your Pizza Oven

Before constructing your brick pizza oven, it’s essential to meticulously plan and design it to guarantee ideal performance and longevity. Start by considering how you’ll prepare your pizza dough; a well-made dough ensures a crisp crust and good oven spring. Think about toppings selection early—choose ingredients that complement each other and cook evenly in high heat. Decide on the size and shape of your oven to match your typical pizza servings and available space. Sketch a detailed design, including the oven’s height, dome shape, and opening size, to optimize heat retention and airflow. Planning these aspects ahead of time helps you create a functional, durable oven that consistently delivers delicious pizzas. Proper design also allows for smoother construction and better use of materials.
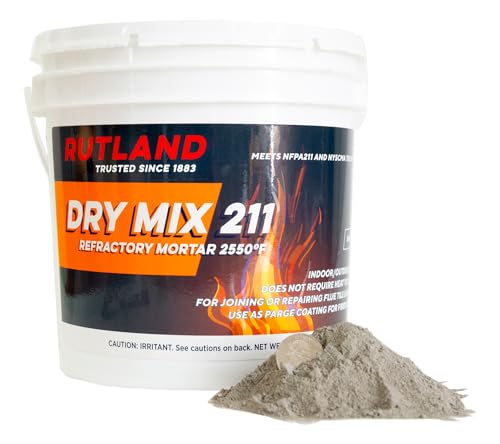
Rutland Dry Mix 211 Refractory Mortar 10 Pound – USA-Made High Temperature Mortar for Masonry – 2550°F Fire Cement Patch for Fireplace Brick, Fire Pit, Kiln, Forge & Pizza Oven Repair
Rated up to 2550 Degree (1400 Degree C)
As an affiliate, we earn on qualifying purchases.
As an affiliate, we earn on qualifying purchases.
Gathering Materials and Tools Needed

Before you start building, you need to gather all the necessary materials and tools. Make sure you have an essential materials checklist and a required tools list to keep everything organized. Having everything ready will make the construction process smoother and more efficient.
Essential Materials Checklist
To construct your DIY brick pizza oven, you’ll need to gather a specific set of materials and tools to guarantee a successful project. Focus on selecting quality fire bricks, which are essential for withstanding high temperatures and ensuring durability. You’ll also need insulation materials to improve heat retention through effective heat insulation techniques.
Here’s what you’ll need:
- Fire bricks for the oven interior and dome
- High-temperature mortar for bonding bricks
- Insulation layers like ceramic fiberboard or perlite
- Refractory cement for sealing and finishing
Choosing the right fire brick selection and heat insulation techniques will make your oven more efficient and long-lasting. Make sure to source these materials beforehand to stay on schedule.
Required Tools List
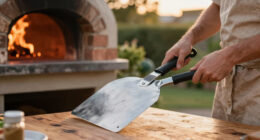
Constructing your DIY brick pizza oven requires gathering the right tools to guarantee the building process goes smoothly. You’ll need basic equipment like a trowel, level, hammer, and masonry saw for precise work. A wheelbarrow and mixing tools are essential for preparing mortar and handling bricks. Don’t forget safety precautions—wear gloves, goggles, and a dust mask to protect yourself from debris and fumes. Regular tool maintenance ensures your tools stay in good condition, preventing accidents and ensuring efficiency. Keep your workspace organized so you can access tools quickly. Properly maintained tools will last longer and make your project safer. By assembling a complete, well-maintained toolkit, you’re setting yourself up for a successful, safe construction process.

Amylove 2 Pcs Ceramic Fiber Insulation Blanket 60 x 24 x 1 Inch High Density Heat 2600f High Temperature Insulation for Stoves, Kilns, Forges, Fire Bricks, Boilers, Pizza Ovens
Designed for Diverse Places: these ceramic fiber blankets are practical and useful, they can be applied in smelting…
As an affiliate, we earn on qualifying purchases.
As an affiliate, we earn on qualifying purchases.
Choosing the Perfect Location in Your Yard

Pick a spot in your yard that gets plenty of sunlight for even cooking, but also offers some shade to stay comfortable. Make sure the area has enough space so you can work easily and entertain guests. Balancing accessibility and openness will help you enjoy your pizza oven for years to come.
Sunlight and Shade
Choosing the right spot in your yard for your brick pizza oven involves considering how sunlight and shade will influence its performance. Proper solar orientation guarantees the oven heats efficiently and retains heat longer. Positioning it in a sunny area minimizes the need for extra fuel. However, you also want some backyard shade to prevent excessive heat during summer gatherings. Imagine:
- The sun casting warm rays directly onto the oven in the late afternoon
- A nearby tree providing dappled shade during the peak heat hours
- Shadows from your house gently cooling one side of the oven
- Wind patterns that might carry cool breezes or hot gusts
Balancing sunlight and shade helps optimize cooking conditions and comfort. Think about how the sun moves across your yard and choose a location that maximizes warmth while offering relief from intense heat.
Accessibility and Space
To make certain your brick pizza oven functions smoothly and fits well into your yard, you need to think about accessibility and space from the start. Choose a location with enough room for movement, cooking, and entertaining. Consider proximity to your kitchen for easy prep, but avoid blocking pathways or views of your garden landscape. Proper outdoor lighting nearby ensures safety during evening use. Think about how often you’ll use the oven and plan space accordingly. Here’s a quick guide:
| Aspect | Consideration | Tips |
|---|---|---|
| Accessibility | Easy access from the house | Clear pathways, no obstacles |
| Space | Enough room for setup and seating | Leave room for tables and chairs |
| Garden landscape | Complement natural surroundings | Enhance with plants or decorative features |
| Outdoor lighting | Visibility during nighttime | Install lights for safety and ambiance |
| Overall layout | Balance between function and aesthetics | Ensure airflow and ventilation |

Pizza Oven Kit
Stainless Steel Construction
As an affiliate, we earn on qualifying purchases.
As an affiliate, we earn on qualifying purchases.
Building the Foundation and Base Structure

Before you start building the brick oven, it’s essential to create a solid foundation that can support the entire structure. A sturdy base guarantees durability and proper oven airflow, preventing cracks and instability over time. Start by leveling the ground and pouring a concrete slab or laying a gravel bed for drainage. Use firebricks to build a durable, heat-resistant base that can withstand high temperatures. Visualize a solid, level surface with precise brick placement, ensuring stability. Picture the foundation as a platform that keeps the oven steady during use. Think of it as the backbone supporting the weight of the brick dome and cooking surface, making sure your DIY oven stands strong for years to come.
Constructing the Oven’s Firebrick Dome

To construct the dome, you’ll start by shaping the firebricks into a curved form that fits your design. As you lay each brick, make certain to secure them firmly to maintain stability. Properly securing the firebricks ensures your dome will be strong and heat-resistant for perfect pizza baking.
Shaping the Dome
Shaping the dome is a essential step in building your brick pizza oven, as it determines the oven’s heat retention and overall structure. During dome shaping, you carefully mold and arrange the firebricks to create a smooth, arching surface. Selecting the right mortar types is crucial; use high-temperature mortar for durability and heat resistance. As you work, picture the following:
- Curving bricks forming a seamless arch
- Layers gradually building upward with precision
- Mortar filling gaps, securing each brick tightly
- The dome tapering into a perfect, rounded shape
This process requires patience, attention to detail, and steady hands. Proper dome shaping ensures your pizza oven maintains consistent heat and withstands the test of time, making every pizza a success.
Securing the Firebricks
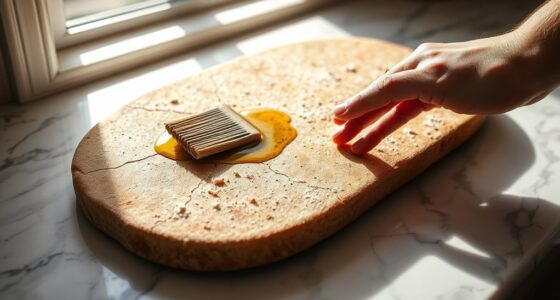
Securing the firebricks is a critical step in building your oven’s dome, as it guarantees stability and heat retention. To guarantee firebrick durability, choose a high-quality, heat-resistant mortar designed for oven construction. Carefully apply the mortar between each brick, maintaining a consistent thickness to promote even bonding. As you place each firebrick, press firmly to set it securely, checking for level and alignment. Pay special attention to the joints, since well-sealed mortar helps retain heat and prevents cracking. Avoid rushing; proper mortar selection and precise application create a sturdy, long-lasting dome. Remember, a strong foundation of well-secured firebricks ensures your pizza oven performs efficiently and withstands high temperatures over time.
Installing Insulation and Heat-Resistant Layers

Before you start installing insulation and heat-resistant layers, make sure the structure is stable and clean. This step is vital for maximizing heat retention and guaranteeing safety. Use high-quality insulation materials designed for high temperatures, such as ceramic fiber blankets or refractory bricks. These layers will help keep the heat inside, making your pizza oven more efficient. As you work, picture:
- Laying down insulating blankets that mold perfectly to the oven’s curves
- Applying heat-resistant mortar to secure the insulation
- Wrapping the entire oven with a protective layer to prevent heat loss
- Ensuring no gaps or cracks that could reduce heat retention
Proper insulation not only improves cooking performance but also protects the oven from weather elements, extending its lifespan. Take your time to guarantee everything fits snugly and securely.
Creating the Oven Opening and Door Frame

Once you’ve completed insulating and protecting the oven, it’s time to create the opening for the door. Start by marking the size and position of the doorway on the front of the oven. Use a chisel and hammer to carefully cut through the brick, ensuring clean edges. As you do this, consider oven ventilation; proper airflow is key for efficient heating and smoke release. Incorporate a chimney construction plan into your design to ensure smoke and fumes vent safely away from your yard. Build a sturdy door frame that fits snugly into the opening, providing insulation and sealing for heat retention. Make sure the frame aligns with your chimney to facilitate proper draft and ventilation. This step guarantees your pizza oven functions effectively and safely.
Finishing Touches: Cladding and Aesthetic Details

Adding finishing touches like cladding and aesthetic details enhances both the appearance and durability of your brick pizza oven. You can choose decorative accents that reflect your style, such as tiles, stones, or metal trims. Consider a cohesive color scheme that complements your yard and creates visual harmony. For example, warm terracotta or natural stone hues blend beautifully with outdoor settings. To add character, incorporate decorative accents like mosaic patterns or wrought iron details. Textured cladding, such as stucco or smooth brick, can also boost durability while enhancing style. Remember, these details not only make your oven stand out but also protect it from the elements, ensuring long-lasting beauty and function.
Curing and Testing Your Brick Pizza Oven

After completing the finishing touches on your brick pizza oven, it’s time to focus on curing and testing it to guarantee the best performance. Begin by slowly building up heat over several days, starting with small fires to allow moisture to escape and prevent cracking. During this process, avoid oven cleaning products that could introduce unwanted chemicals; instead, keep the interior clean by removing ash and debris. Proper brick selection is essential—use firebricks designed to withstand high temperatures and ensure even heat distribution. As you test the oven, monitor how well it retains heat and how evenly it cooks. This gradual curing helps strengthen the brickwork, guaranteeing your oven performs at its best and lasts for years.
Tips for Maintaining and Using Your Oven Effectively

To keep your brick pizza oven performing at its best, regular maintenance is essential. Proper use and upkeep guarantee safety and peak cooking results. Always prioritize fire safety by keeping the area clear of flammable materials and never leave a burning fire unattended. Regularly inspect your oven for soot buildup and debris, and perform thorough oven cleaning to prevent flare-ups. When cooking, use dry, seasoned wood to reduce smoke and creosote. After each use, clear out ashes to improve airflow and heat retention. To maintain your oven’s longevity, cover it with a weatherproof tarp during harsh weather. Remember, a clean oven and vigilant fire safety habits help you enjoy delicious pizza safely and efficiently.
Frequently Asked Questions
How Long Does It Typically Take to Build a Brick Pizza Oven?
Building a brick pizza oven usually takes about 1 to 2 weeks, depending on your construction timeline and material selection. If you gather quality bricks and durable mortar early on, the process speeds up. You’ll spend a few days on foundation work, then several days assembling and curing the structure. Rushing can lead to issues, so plan carefully and allocate enough time for each stage to guarantee a successful build.
Can I Build the Oven Alone or Do I Need Help?
You can attempt building the oven alone, but don’t be surprised if your DIY tools suddenly seem inadequate or if construction permits turn into a wild goose chase. While it’s possible to do it solo, having help makes the process smoother, safer, and more enjoyable. Remember, even if you’re confident, seeking assistance or advice guarantees you avoid mistakes that might turn your pizza dreams into a construction nightmare.
What Safety Precautions Should I Follow During Construction?
You should prioritize fire safety and wear protective gear during construction. Always keep a fire extinguisher nearby, and work in a well-ventilated area to prevent smoke buildup. Wear gloves, goggles, and a dust mask to protect your skin, eyes, and lungs from debris and dust. Guarantee your tools are in good condition, and avoid loose clothing. Following these safety precautions keeps you safe while building your pizza oven.
How Much Does It Cost to Build a DIY Brick Pizza Oven?
Building a DIY brick pizza oven can cost around $300 to $2,000, depending on your choices. Think of it as planting a seed that grows into a cozy backyard haven—cost considerations and material expenses shape the final look and feel. You’ll need bricks, mortar, insulation, and a few tools, so plan your budget carefully. With some effort, you’ll turn your yard into a delicious, oven-fueled oasis.
Is It Possible to Customize the Oven’s Size and Shape?
Yes, you can customize the oven’s size and shape to suit your yard and cooking needs. With some design flexibility, you can adapt the dimensions, arch, or even add features like a chimney or seating area. Your customization options allow you to create a unique, functional pizza oven that complements your outdoor space. Just guarantee your design maintains structural integrity while reflecting your personal style and cooking preferences.
Conclusion
Now, with your DIY brick pizza oven standing proud in your yard, you’re basically the king or queen of pizza paradise! Imagine hosting legendary pizza nights where flames dance and cheesy goodness flows endlessly. Your backyard will turn into the ultimate feast zone, rivaling any pizzeria. So fire it up, release your inner pizza maestro, and watch as your homemade oven transforms every slice into a masterpiece that’s simply unforgettable. Your culinary kingdom awaits!