If your smoker isn’t reaching the right temperature, start by checking that it’s plugged in and the power cord isn’t damaged. Verify the thermostat and sensor are clean and calibrated properly. Make sure you’re using fresh, dry fuel and that vents are open for airflow. Regularly clean the burn pot and chimney to prevent blockages. Fine-tuning vent settings can boost heat, but for more detailed steps, there’s always more to review.
Key Takeaways
- Check and clean the fuel supply, vents, and chimney to ensure proper airflow and consistent combustion.
- Confirm the thermostat and temperature sensor are calibrated and functioning accurately.
- Ensure the smoker is plugged in properly and the power cord is undamaged.
- Adjust vents gradually to increase airflow and heat, especially in cold or windy conditions.
- Regularly maintain and clean the burn pot, chimney, and ash buildup to prevent airflow restrictions.

2 Pack BBQ Grill Temperature Gauge, 3 inch Dial Face Charcoal Grill Pit Smoker Thermometer Gauge BBQ Temp Gauge Grill Thermometer
3-1/8 inch large dial barbecue grill smoker pit thermometer gauge
As an affiliate, we earn on qualifying purchases.
As an affiliate, we earn on qualifying purchases.
Checking the Power Source and Connections

Have you checked that your smoker is properly plugged in and the outlet is functioning? Start by inspecting the power outlet to confirm it’s providing power. Plug in a different device to verify the outlet works correctly. Next, examine the electrical cord connected to your smoker. Look for any visible damage, fraying, or cuts that could interrupt the electrical flow. Make sure the cord is securely plugged into both the outlet and the smoker. Sometimes, a loose connection can cause insufficient power, leading to temperature issues. If your electrical cord has any damage, consider replacing it before attempting to power on the smoker again. Confirming these basic connections are intact can often resolve power-related problems and get your smoker back to peak operation.

Temp Probe Replacement for Pit Boss Smokers and Grills, Meat Probe Sensor Compatible with PB1000XL-025-R00 V2 (70123-AMP)
COMPATIBILITY: This temperature probe sensor compatible with Pit Boss models: Classic, Austin XL, Navigator 1150, 700, 820, 850,…
As an affiliate, we earn on qualifying purchases.
As an affiliate, we earn on qualifying purchases.
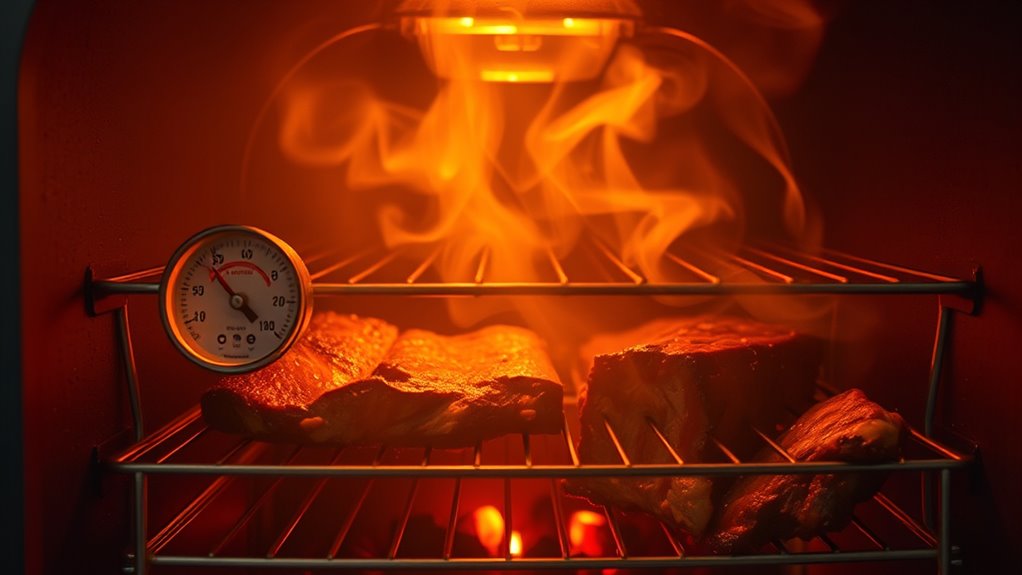
Inspecting the Thermostat and Temperature Sensor

After confirming your smoker’s power connections, the next step is to inspect the thermostat and temperature sensor. Check if the thermostat is properly calibrated; an incorrect calibration can cause inaccurate temperature readings, resulting in a low temperature. Use a thermometer to verify if the thermostat’s display matches actual temperatures. If calibration is off, you may need to adjust or recalibrate the thermostat. Next, examine the temperature sensor for damage or dirt that could interfere with accurate readings. If the sensor appears faulty or unresponsive, consider replacing it. A new temperature sensor ensures your smoker accurately detects temperature, helping maintain the desired heat. Proper inspection and calibration of these components are essential to resolving issues with low temperatures and achieving consistent smoking results.

DOZYANT BBQ Charcoal Grill Smoker Temperature Gauge Pit Barbecue Thermometer Fahrenheit and Heat Indicator for Meat Cooking Port Lamb Beef, Stainless Steel Temp Gauge
The 2 3/8" large face of the temperature gauge makes it easy to read and classify the temperature…
As an affiliate, we earn on qualifying purchases.
As an affiliate, we earn on qualifying purchases.
Verifying the Fuel Supply and Quality
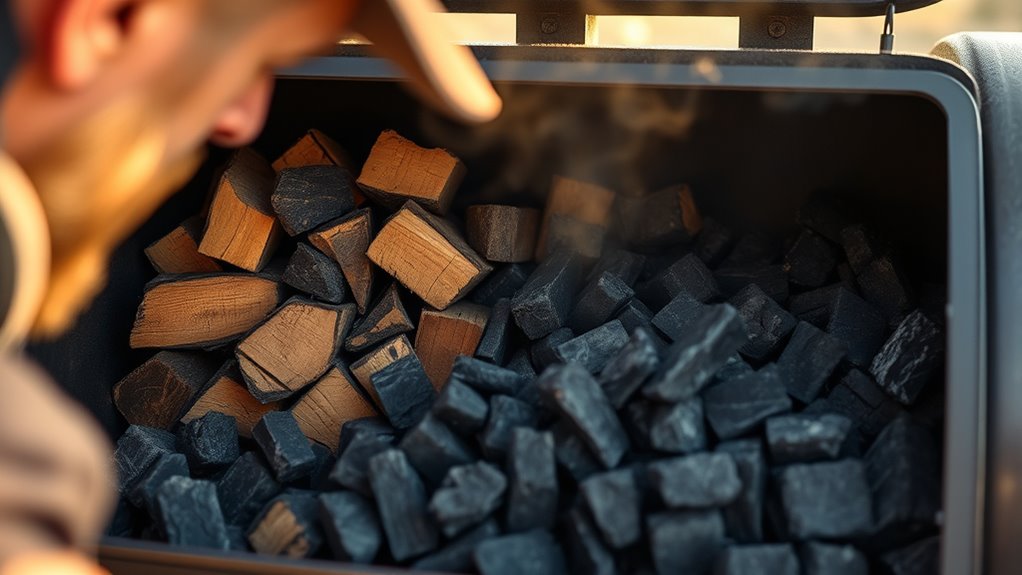
Is your smoker’s fuel supply sufficient and of good quality? Poor fuel quality can cause inconsistent heat or low temperatures, so guarantee your fuel is fresh, dry, and appropriate for your smoker. Check your ignition method—whether you’re using charcoal, wood, or pellets—to confirm it’s functioning properly. If you’re using charcoal, avoid older or damp briquettes, which burn inefficiently. For wood or pellets, ensure they’re stored in a dry place to prevent moisture absorption. Inadequate ignition can lead to incomplete combustion, reducing heat output. Make sure your fuel is loaded correctly and that the ignition method is working smoothly. Verifying these factors helps maintain a consistent temperature and prevents your smoker from running too low.

Unlorspy 2Pcs BBQ Smoker Air Vent, BBQ Smokestack Damper Smoker Exhaust Stack for Optimal Grill Airflow Control Vent(95mm)
【Durable Stainless Steel Build】Crafted from premium rust-resistant stainless steel, this 95mm smokestack damper withstands high heat and harsh…
As an affiliate, we earn on qualifying purchases.
As an affiliate, we earn on qualifying purchases.
Examining the Ventilation and Airflow System

Proper ventilation and airflow are essential for maintaining consistent temperatures in your smoker. If airflow obstructions occur, they can restrict the movement of air, causing your smoker’s temperature to stay low. Check for blockages in vents, air intake ports, and exhaust outlets, as debris or buildup can hinder airflow. Your smoker’s ventilation design also plays an important role; make sure vents are open and positioned correctly to promote proper circulation. Adjusting airflow settings can help increase temperature, but if airflow is restricted by obstructions or poor design, it won’t be effective. Regularly inspecting and clearing vents and air pathways keeps air moving freely, guaranteeing your smoker reaches and maintains the desired temperature. Proper airflow management is key to consistent, successful smoking.
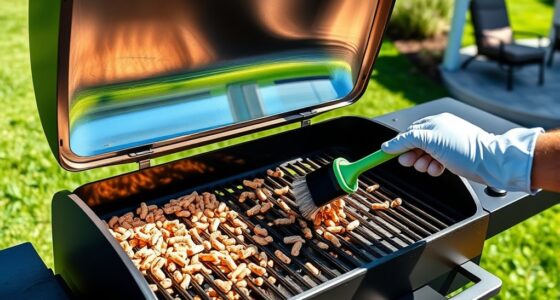
Cleaning and Maintaining the Burn Pot and Chimney

Keeping your burn pot clean guarantees efficient burning and better smoke flavor. Regularly inspect and clear out ash buildup, and maintain your chimney to prevent blockages. These simple steps help your smoker run smoothly and produce consistent results.
Burn Pot Cleaning Tips
Regularly cleaning your burn pot and chimney is essential to keep your smoker operating efficiently. Start by removing any ash buildup, which can block airflow and cause temperature dips. Clear out old ash and debris to make certain of proper combustion. When replacing charcoal, make sure to use fresh, dry fuel to promote consistent heat. During cleaning, check the burn pot for any residue or clinker that might restrict airflow. Scrape away stubborn deposits with a brush or scraper, and wipe the area clean. Regular ash removal prevents blockages and maintains steady temperatures. Keeping the burn pot free of debris not only improves heat consistency but also extends the life of your smoker. Consistent maintenance ensures your smoker performs at its best.
Chimney Maintenance Practices
To guarantee your smoker operates efficiently, it’s crucial to regularly clean and maintain the chimney and burn pot. Proper maintenance ensures ideal smoke circulation and prevents draft issues. Focus on clearing creosote buildup and debris that can hinder airflow, reducing heat and causing low temperatures. Check the chimney insulation; damaged or worn insulation can lead to heat loss and uneven cooking. Keep the chimney free of blockages to maintain steady smoke flow. Regularly inspect the burn pot for ash buildup, which can obstruct airflow and diminish temperature control. Maintaining these parts improves efficiency and flavor.
- Eliminate ash buildup for consistent heat
- Clean chimney interior to promote smooth smoke flow
- Inspect chimney insulation for damage
- Clear debris that blocks smoke circulation
- Regularly check for and fix leaks
Preventing Blockages Effectively
Have you ever faced uneven cooking or smoke issues in your smoker? Blockages in the burn pot or chimney can cause airflow problems, leading to temperature fluctuations. To prevent these issues, focus on blockage prevention by regularly cleaning these components. Remove ash buildup and residue that can restrict airflow, ensuring the fire has enough oxygen to burn efficiently. Keep the chimney clear of soot and debris so smoke can escape smoothly, maintaining proper airflow optimization. Use a wire brush or a scraper to clean these areas thoroughly after each use. Consistent maintenance prevents blockages from forming, helping your smoker operate at the correct temperature. Proper airflow is key to achieving even cooking and better smoke flavor, so don’t overlook these simple but essential cleaning steps.
Adjusting the Damper and Vent Settings

You need to set your damper and vents correctly to control airflow and temperature. Proper damper positioning and vent adjustments help maintain consistent heat and smoke levels. By mastering these techniques, you’ll guarantee your smoker operates efficiently every time.
Proper Damper Positioning
Proper damper positioning is essential for maintaining the right airflow and temperature inside your smoker. You want to guarantee that fresh air enters efficiently, especially considering your smoker placement and ambient conditions. Adjust the damper gradually to find the sweet spot that keeps your smoke steady and consistent. Poor damper control can lead to temperature fluctuations or too low heat. Remember, small changes matter—your smoker’s environment influences airflow needs. By mastering damper positioning, you gain better control over your smoking process and achieve tender, flavorful results. Take pride in tuning your damper, and watch your craft improve with each cook.
- Feel confident knowing you’re controlling the heat precisely.
- Experience the satisfaction of perfect smoke every time.
- Overcome frustration from inconsistent temperatures.
- Unleash your smoker’s full potential.
- Enjoy the aroma of perfectly smoked meat.
Vent Adjustment Techniques
Adjusting the damper and vent settings is essential for fine-tuning airflow and temperature in your smoker. Proper vent adjustments help regulate oxygen flow, which impacts the burn rate and heat output. If your smoker isn’t reaching the desired temperature, try opening the vents slightly to increase airflow. Keep in mind that smoker insulation and ambient temperature also influence how effectively heat stays inside. A well-insulated smoker retains heat better, so you might need to make smaller adjustments. Conversely, a cold environment can cause temperature drops, requiring you to open vents more to compensate. Always adjust gradually, checking your thermometer after each change. Fine-tuning vent settings allows you to maintain consistent heat without overfiring or underheating your smoker.
Maintaining Consistent Airflow
Maintaining consistent airflow is crucial for steady temperatures and ideal smoke quality. Properly adjusting your damper and vent settings ensures your smoker responds to airflow sensors and fan speed controls. When airflow is balanced, your smoker maintains a stable environment, preventing temperature drops. To achieve this, monitor how open or closed your vents are, and tweak accordingly. Be attentive to the smoker’s feedback, adjusting the damper gradually to avoid sudden shifts. Remember, good airflow keeps the smoke smooth and flavors rich.
- Feel confident knowing you control every burn and smoke cycle
- Experience the satisfaction of perfect, consistent results
- Eliminate guesswork with precise airflow adjustments
- Enjoy the aroma of slow-cooked, flavorful meat
- Master your smoker’s potential for unforgettable meals
Testing and Calibrating Your Smoker’s Temperature Controls
To guarantee your smoker cooks evenly and reliably, it’s essential to test and calibrate its temperature controls regularly. Accurate temperature readings ensure your cooking techniques produce consistent results and help you avoid under- or overcooking. Start by using a reliable meat thermometer placed in the smoker’s cooking chamber to verify the built-in controls. If you notice discrepancies, adjust the controls accordingly or consider recalibrating the thermostat if your smoker allows. Proper calibration not only improves temperature accuracy but also enhances flavor development by maintaining steady heat. Regular testing ensures your smoker operates at the desired temperature, leading to better flavor enhancement and more predictable results. Make calibration a routine part of your maintenance to keep your smoker performing at its best.
Frequently Asked Questions
How Can I Improve Smoke Flavor With a Low-Temperature Smoker?
To boost smoke flavor with a low-temperature smoker, focus on smoke infusion and wood chip selection. Use dry, seasoned wood chips for stronger smoke. Add more wood chips or replenish them frequently to enhance flavor. Consider using hardwoods like hickory or mesquite, known for their rich smoke. Keep the lid closed as much as possible to maximize smoke contact, ensuring your meat absorbs more smoky goodness despite the low heat.
What Safety Precautions Should I Take When Troubleshooting Electrical Issues?
Did you know that electrical hazards cause over 30,000 injuries annually? When troubleshooting electrical issues in your smoker, prioritize electrical safety by unplugging the device first. Use insulated tools and wear rubber gloves to avoid shocks. Follow troubleshooting steps carefully, checking connections and fuses. Always work in a dry environment and avoid contact with water or metal parts. Your safety is essential during any electrical troubleshooting process.
Can External Weather Conditions Affect My Smoker’s Temperature?
External weather conditions definitely impact your smoker’s temperature. Cold, wind, or rain can cause a significant weather impact, making it harder to maintain a consistent temperature. When outdoor conditions are harsh, your smoker needs extra insulation or a windbreak to stabilize heat. Be mindful of changing weather, and consider adjusting your cooking approach or using a cover to protect your smoker from unpredictable outdoor elements.
How Often Should I Replace the Temperature Sensor?
You should replace your smoker’s temperature sensor every 2 to 3 years, depending on its sensor lifespan and usage. Regularly check for signs of malfunction, like inconsistent readings or slow response times. If you notice these issues, it’s time for a replacement. Keeping your sensor in good condition guarantees accurate temperature readings, helping you cook perfectly every time. Don’t wait for total failure—timely replacements maintain peak smoker performance.
Are There Any Signs Indicating My Smoker Needs Professional Repair?
Nearly 60% of smokers require professional repair at some point. If your smoker’s temperature remains inconsistent despite proper maintenance, or if it won’t turn on, these are clear signs you need expert repair diagnostics. Unusual smoke, strange noises, or persistent temperature issues also indicate problems beyond simple troubleshooting. Don’t dismiss these signs—professional repair ensures your smoker functions safely and efficiently, extending its lifespan and maintaining perfect cook results.
Conclusion
By troubleshooting these key areas, you’ll get your smoker back on track, firing like a well-tuned orchestra. Think of it as tuning a guitar—you need each string just right for the perfect sound. With patience and attention to detail, you’ll turn low temperatures into smoky perfection, making every cookout a hit. Remember, a little troubleshooting today guarantees deliciousness tomorrow. Keep testing, adjusting, and enjoying the flavorful journey ahead.